Build a buffer
Posted 2007-03-10 in Effects by Johann.
In this tutorial, I’ll show you how to build a buffer pedal.
For an introduction to buffers, see Jack Orman’s “Basic Buffers” article.
List of parts
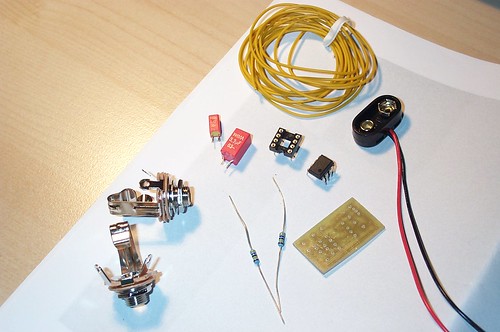
- 1 “Buffer - IC” board from General Guitar Gadgets (US$ 7)
- 2 4.7 MΩ resistors
- 1 single channel opamp, for example a TL071
- 2 capacitors (I used one 0.47 and one 3.3 µF WIMA capacitor)
- 1 8-pin DIL socket
- 1 stereo jack
- 1 mono jack
- 9 V battery clip
In my opinion, a buffer should be always-on, so from the schematics, I’ll omit R4 and the switching. You also don’t have to use my capacitor values, it’s just that they were the biggest polyester capacitors I had laying around. The original 0.1 µF and 10 µF values are fine, too.
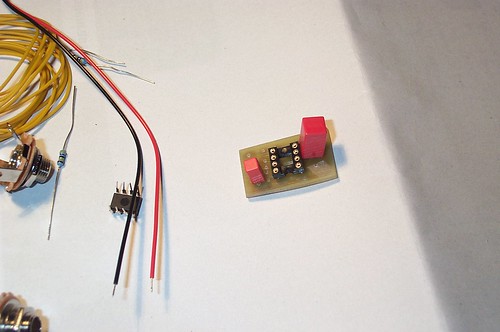
Soldering the socket to the board
Put the socket on the board and solder it in.
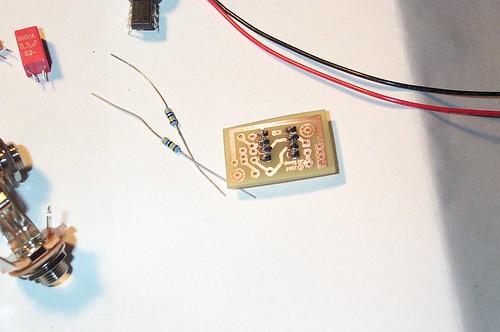
Capacitors
Solder the smaller capacitor to the left side and the large one to the right side.
Resistors
The resistors go right next to the small capacitor.
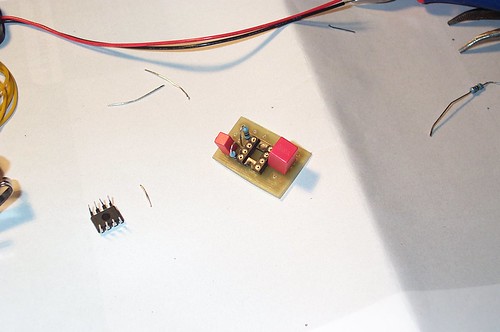
Power, audio connections and the opamp
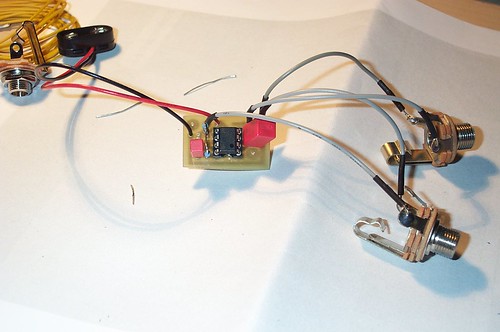
For testing purposes, solder the battery clip and the connections to the jacks directly to the board. Don’t forget to squeeze the opamp into the socket.
Note that the opamp was accidentally reversed in the above photo. The dot on the opamp’s case should point upwards.
Connect a battery and your buffer should work. That’s really all.
Where to go from here
All that’s left to do is to wire the GND connection (the black cable on the battery clip) to a stereo jack so that the circuit will only be active when a guitar is plugged in.
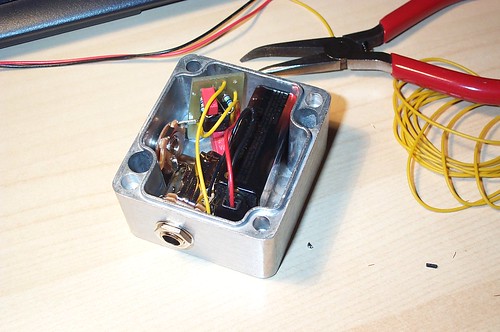
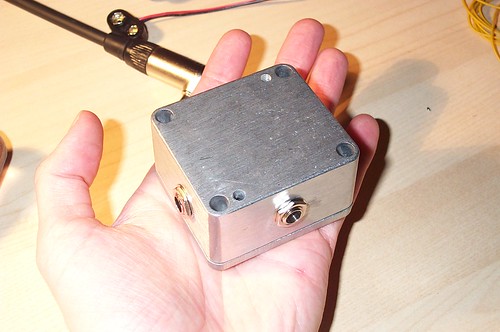
Of course, you’ll also need a case, for example a Hammond 1590B or a mini Bud case.
5 comments
Building Atmos pedals
Posted 2007-02-05 in Effects by Johann.
A while ago I seriously considered building pedals regularly. As it turns out, I’m really slow at building pedals (although I have much better tools now), so I’ll just release my designs and let everyone enjoy them (or not).
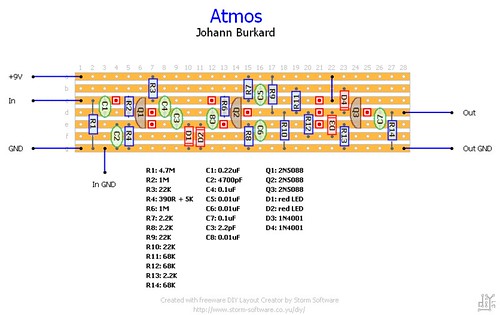
The first one is called Atmos – it’s a Green-Ringer-inspired circuit that sounds very atmospheric.
Enjoy the circuit and let me know if there are any problems.
DeArmond Tremolo Control clip
Posted 2007-03-19 in Effects by Johann.
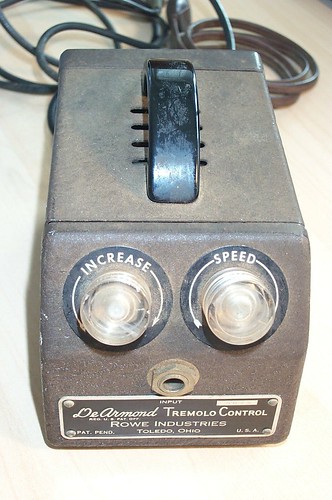
My DeArmond Tremolo Control.
Audio
Here is a sound clip of the DeArmond Tremolo Control – first clean, then with the trem on.
- As MP3 (2.97 MB)
- As Ogg Vorbis (1.5 MB)
5 comments
JFET Preamp/Splitter
Posted 2006-08-27 in Effects by Johann.
I finished an important part of my Marshall Super Lead-based rig today: A preamp/splitter. The preamp allows me to run longer cable lengths while also providing a little bit of volume boost. It will be placed at the beginning of the chain. The splitter is used to distribute the signal to one of the Super Lead’s two inputs (clean/dirty).
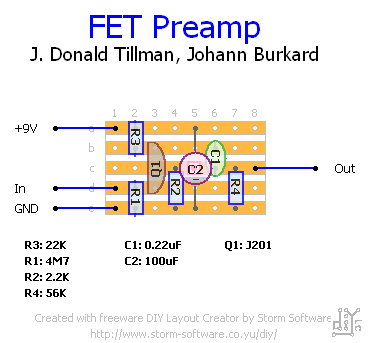
The circuit uses a J201 JFET and follows J. Donald Tillman’s “Discrete FET Guitar Preamp” design with some minor modifications to make the amplification more linear.
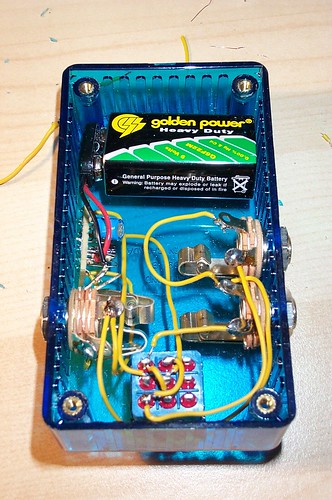
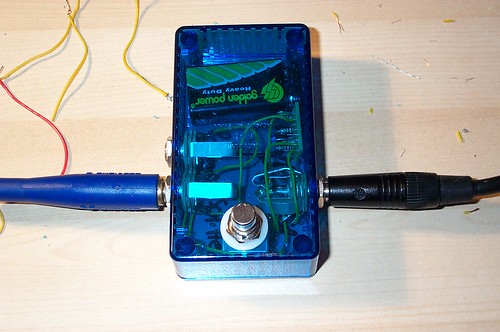
The obvious gut shot.
6 comments
Pages
Page 1 · Page 2 · Page 3 · Page 4 · Page 5 · Page 6 · Next Page »
Subscribe
RSS 2.0, Atom or subscribe by Email.
Top Posts
- DynaCloud - a dynamic JavaScript tag/keyword cloud with jQuery
- 6 fast jQuery Tips: More basic Snippets
- xslt.js version 3.2 released
- xslt.js version 3.0 released XML XSLT now with jQuery plugin
- Forum Scanners - prevent forum abuse
- Automate JavaScript compression with YUI Compressor and /packer/